Pre-Launch Checklist
Ready to ship your app with Superwall? Here is a last minute checklist to give you confidence that you’re ready to ship without issue.
Have a card on file.
In your Superwall account, make sure you’ve got a card on file to avoid any service disruptions.
Go to Settings->Billing in your Superwall account to add one if you haven’t yet.
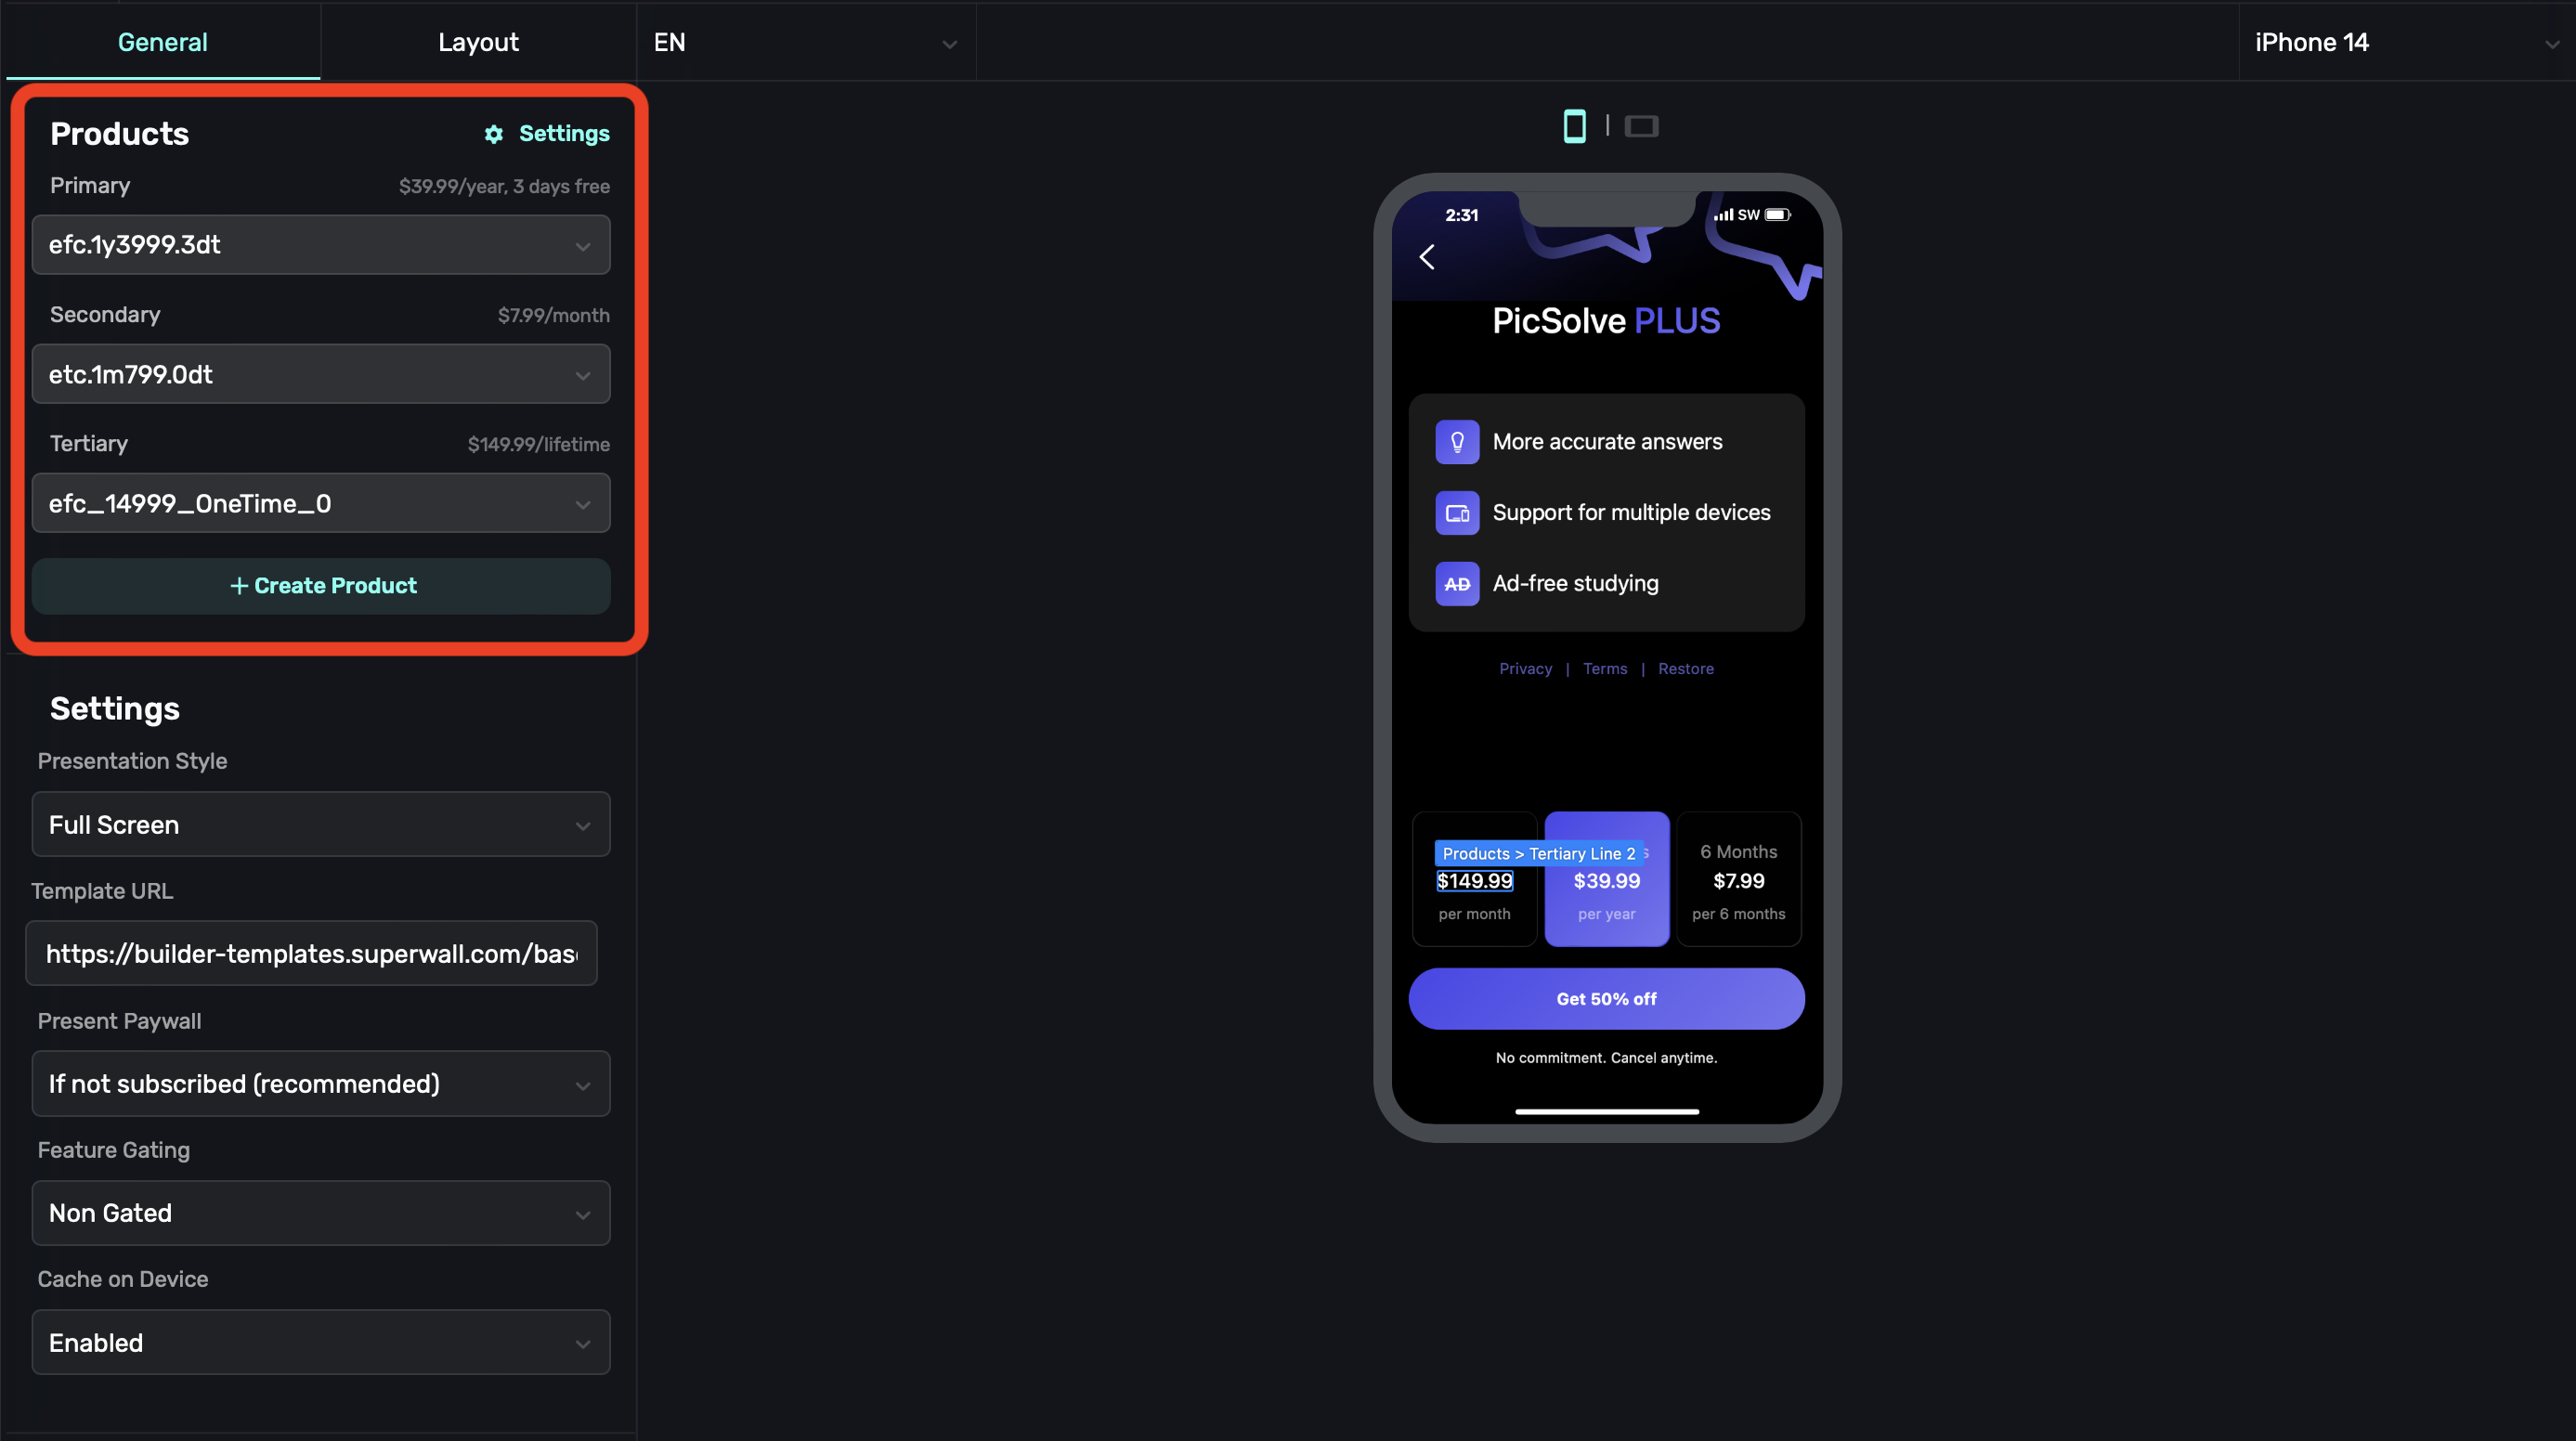
Products are correctly configured.
Set up your products in their respective storefront first, whether that’s App Store Connect or Google Play. Once you’ve done that, add them into Superwall. All of their respective identifiers should match what they are in each storefront. For more details, refer to this page.
Products are on a paywall
Each paywall should display one or more of those previously added products. You can associate them easily on the left hand side of the paywall editor.
SDK is configured.
Be sure your paywall presents and our SDK is configured in your app. If you need to double check things, check out the docs for the relevant platform.
Complete a purchase.
Next, after your paywall shows in Testflight and beta builds, make sure you can successfully purchase a product, start a trial or kick off a subscription. If you run into an issue, try these steps in our troubleshooting guide. They solve a majority of the common problems.
All subscriptions are approved.
Finally, make sure that your subscriptions have been approved in each storefront. On App Store Connect, for example, you’ll have to send off each one individually for review. If this is your initial launch, you can have them approved alongside the first build of your app.
If everything looks good here, you should be ready to launch with Superwall.
Bonus Steps
These aren’t essential, but they are good to think about to make sure you’re leveraging all Superwall has to offer.
Create a survey
No matter how much you optimize flows, designs or copy — the truth is that, statistically speaking, the majority of users will not convert. Finding out why is key, and you can do that with our surveys that you can attach to any paywall.
Once a user closes a paywall, we’ll present the survey attached to it. See how to set them up here.

Don't be shy about placements
If you’re new to Superwall, it might be tempting to use one, do-it-all placement — like showPaywall or something similar. We don’t recommend this, please use an individual placement for each action or scenario that could possibly trigger a paywall. The more placements you have, the more flexible you can be. It opens up things like:
- Showing a particular paywall based on a placement. For example, in a caffeine tracking app, two of them might be
caffeineLoggedandviewedCharts. Later, you could tailor the paywall based on which placement was fired. - You can dynamically make some placements “Pro” or temporarily free to test feature gating without submitting app updates.
- In your campaign view, you can see which placements resulted in conversions. This helps you see what particular features users might value the most.
The easy advice is to simply create a placement for each action that might be paywalled.
Use custom audiences
Audiences are how Superwall can segment users by filtering by several different values such as the time of day, app version and more. This lets you target different paywalls to certain audiences. To see an example of how you might set up an advanced example, see this video: