Welcome
Superwall gives you the ability to remotely update your purchase screen (a.k.a. paywall), without shipping app updates. Changing things like pricing, design, location, text and discounts takes a few seconds from Superwall’s dashboard.
Here’s how:
- Configure SuperwallKit, Superwall’s SDK within your app.
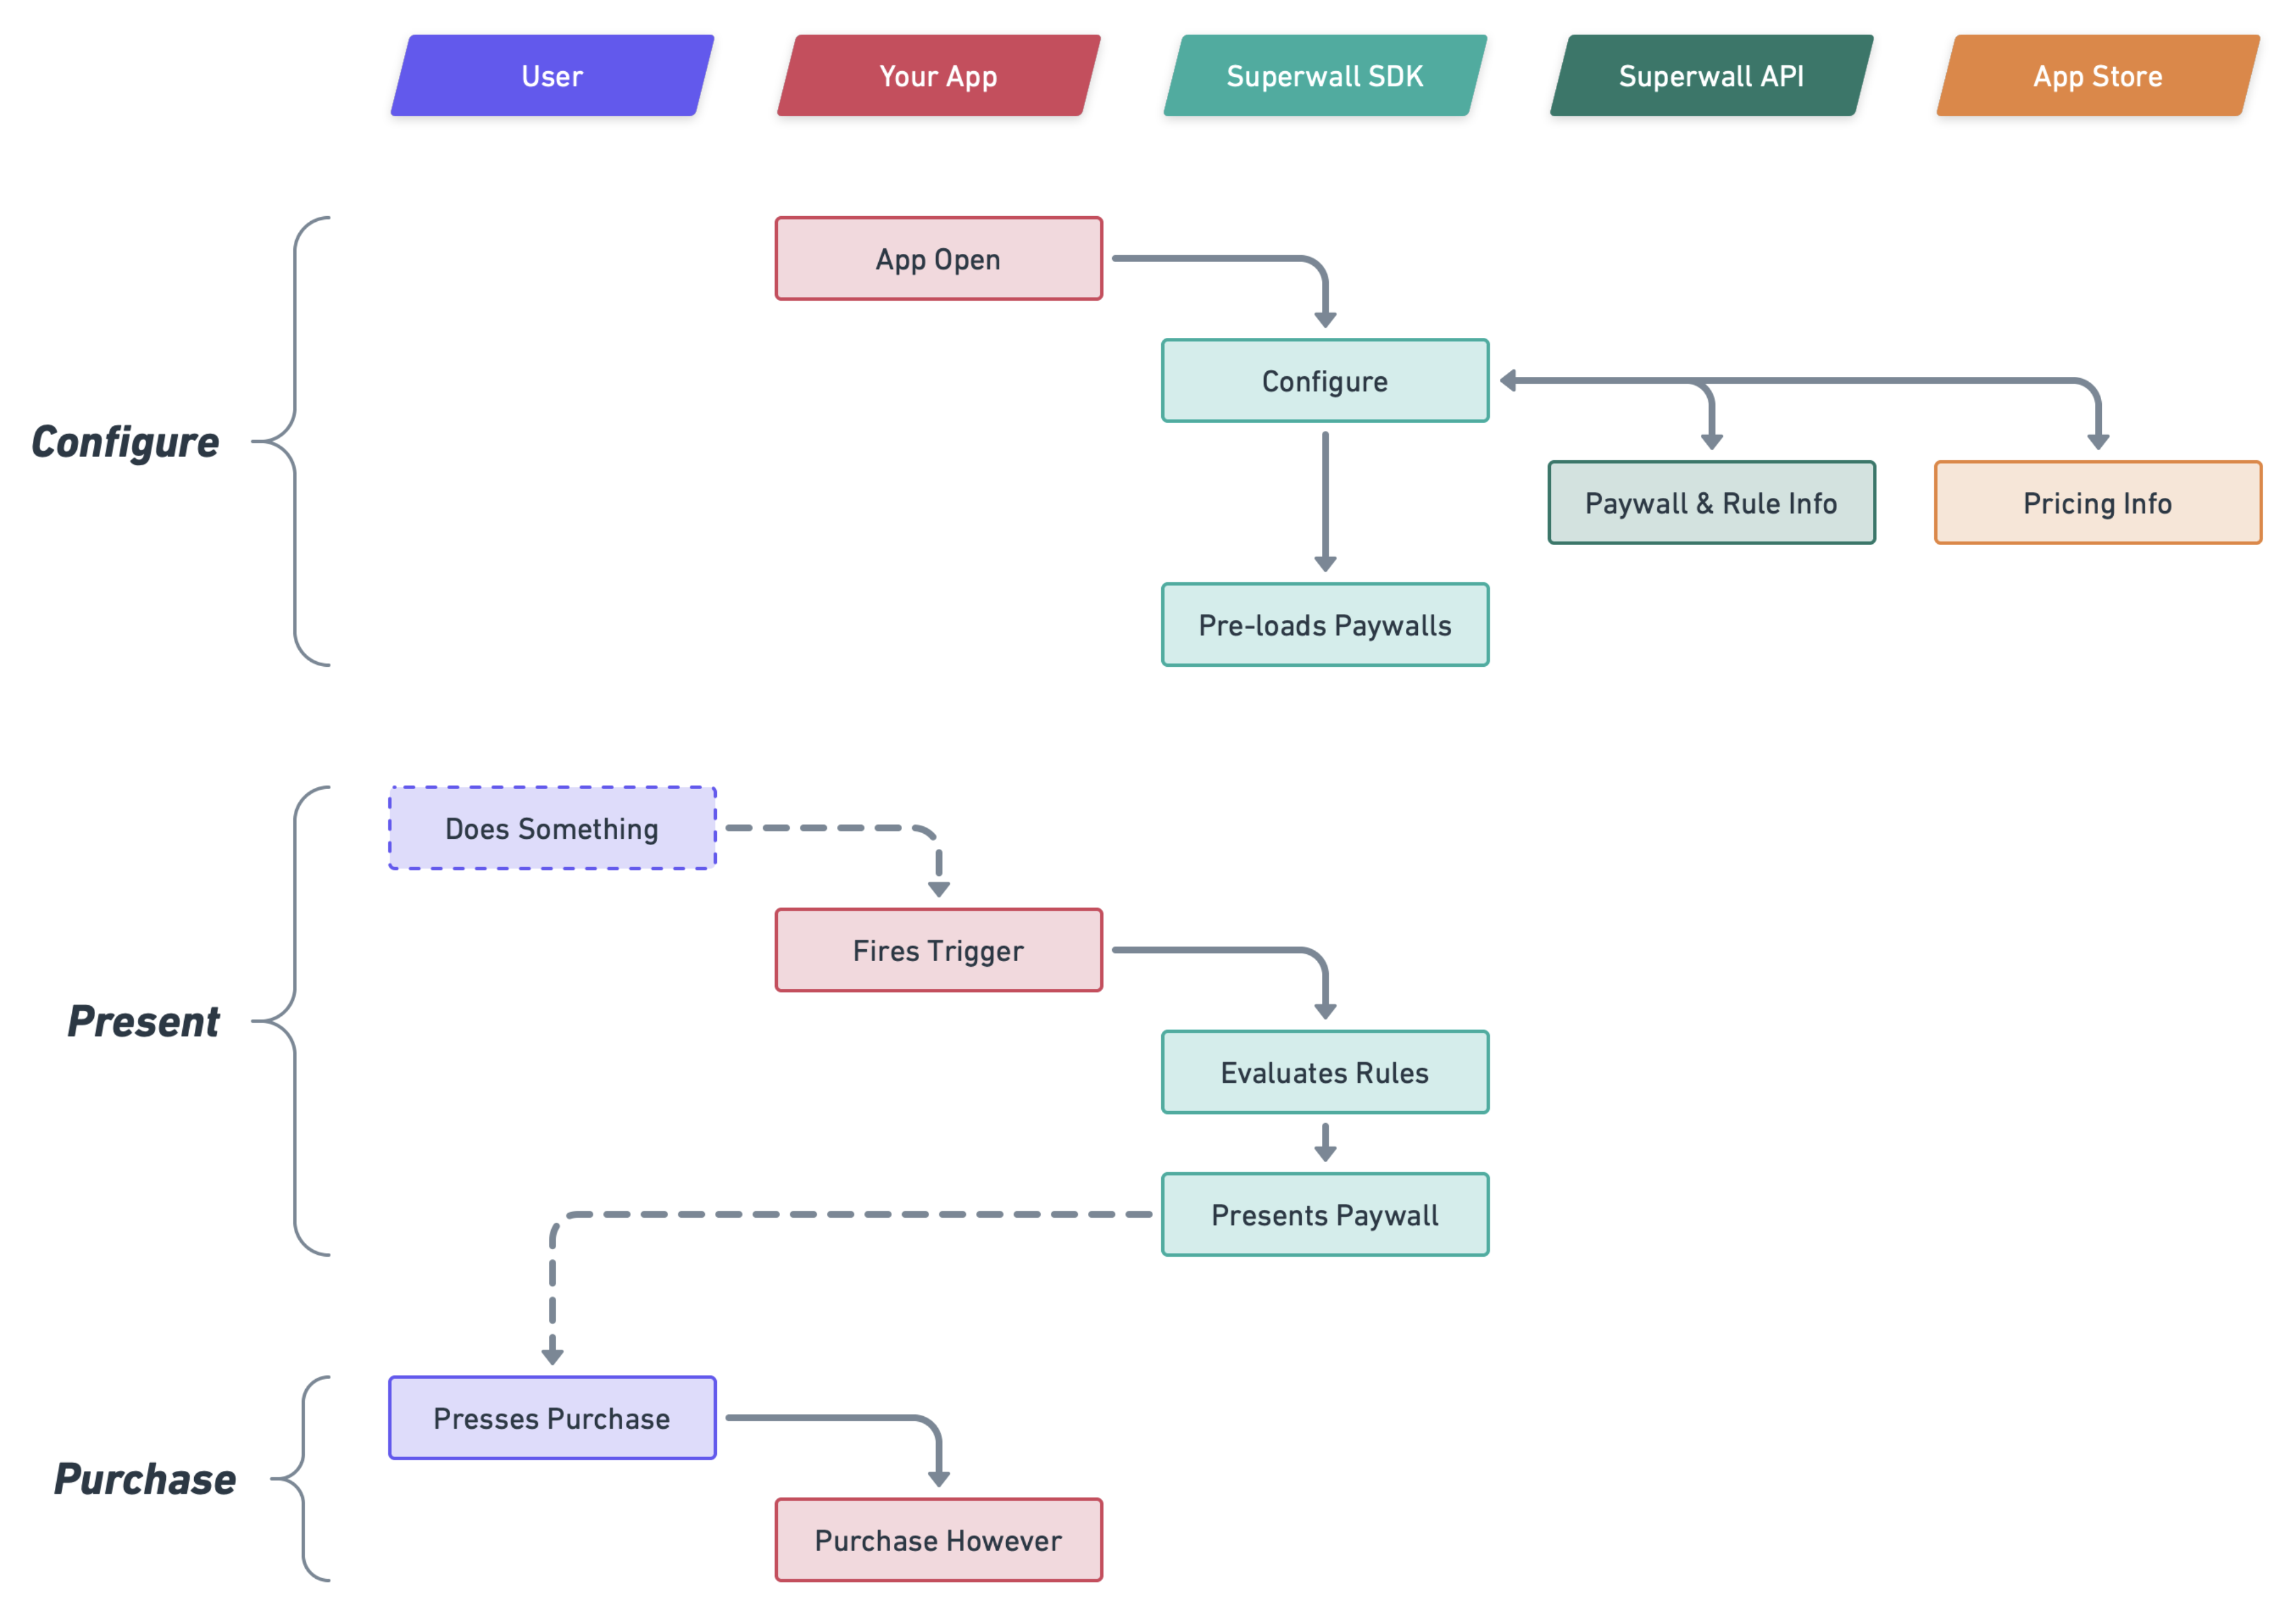
- SuperwallKit presents the right paywall at the right time, based on your dashboard settings.
Subscription logic is handled automatically by SuperwallKit but you can implement your own via StoreKit, RevenueCat or any other payments SDK.
If you haven’t already, sign up for a free account to start building.
Updating from v2 of the SDK? Take a look at our migration guide.
Quick Start
Get up and running with a guided tutorial when you sign up on Superwall.com
Using the Dashboard
Learn how to run tests, build paywalls, and more
How it Works
Superwall is built on 3 core principles:
- Events
- Rules
- Paywalls
When your app registers an event, evaluate a rule to decide which paywall to show the user.
Events and Rules are grouped in a concept we call Campaigns.
Rapid Iteration
Paywalls and Campaigns are all defined in the Superwall Dashboard.
Integrating SuperwallKit into your app is usually the last time you’ll have to write paywall related code.
This allows you to iterate on 5 key aspects of your monetization flow, without shipping app updates:
- Design
- Text / Copy
- Placement
- Pricing
- Discounts
Paywalls
All paywalls are websites. Superwall uses a script called Paywall.js to turn these websites into paywall templates. SuperwallKit loads these websites inside a UIWebView and executes javascript on them to replace text and template product information. This gives you the flexibility to turn any design into a paywall and update it remotely.
Since building websites can be tedious, we maintain a growing list of highly converting paywall templates for you to choose from. These designs are used by some of the biggest apps on the App Store and are perfect to get you up and running in no time.
However, if you’d like to build your own paywall website from scratch, we recommend using Webflow. We maintain a cloneable Webflow template that includes ~50 of the most prominent paywall elements we’ve seen across thousands of apps, which you’re welcome to use. Another alternative is to just wait for us to build you a free paywall 👇
Everyone gets a free paywall
Superwall has built hundreds of paywalls for clients and has a unique vantage point on the industry. As a token of gratitude for signing up, we create a paywall for each customer, using best practices we’ve picked up along the way. Check your email for updates, we’ll add it to your dashboard when it’s ready.
Rules
Rules allow you to conditionally show a paywall to a user. For example, you may want to only show users paywalls if they have no remaining credits or if their account is over 24 hours old.
Rule evaluations happen client side, so no network requests are fired to determine whether or not to show a paywall.
Events
Events are added to campaigns and are registered via SuperwallKit. SuperwallKit listens for these events and evaluates their rules to determine whether or not to show a paywall.
Diagram


